Qt 3D Animation Easter Teaser Using Blender and Qt 3D in Qt 5.9 to create, texture, and animate a model
As an Easter treat here is a quick taster of some of the animation goodies coming to Qt 3D along with Qt 5.9. In this post we will briefly outline the steps needed to create a simple Qt 3D application and the assets it uses to produce this little animation:
The basic steps are:
- Create the geometry
- UV unwrap the geometry
- Create textures
- Create the animation
- Code the application
The full code for this example is available on GitHub (requires OpenGL 4 on Windows/Linux at the moment). So without further ado, let’s get cracking (sorry).
Modeling the Egg
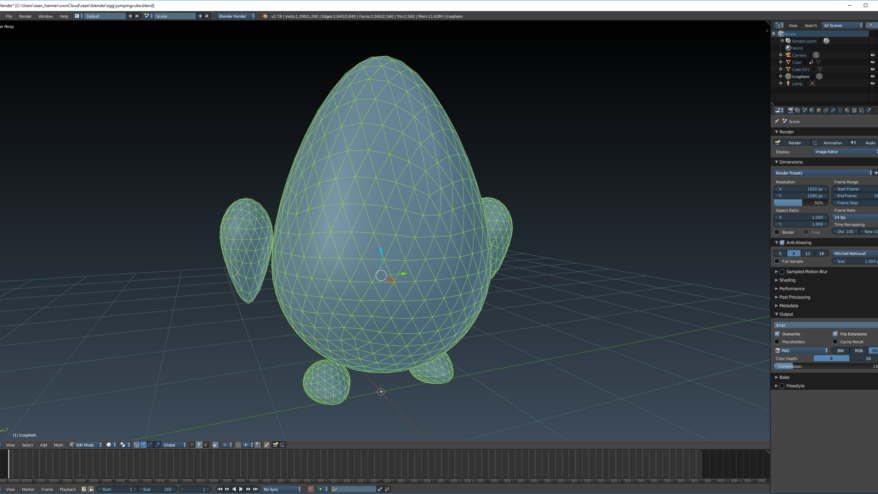
I won’t bore you with all the details but using your favourite 3D tool create the basic character geometry. I used Blender as it is free, easily customisable, and also an awesome 3d editor. This little egg-like character is simply a collection of 5 icospheres that have been distorted using the proportional editing tool to get the ovoid appearance.
UV Unwrapping
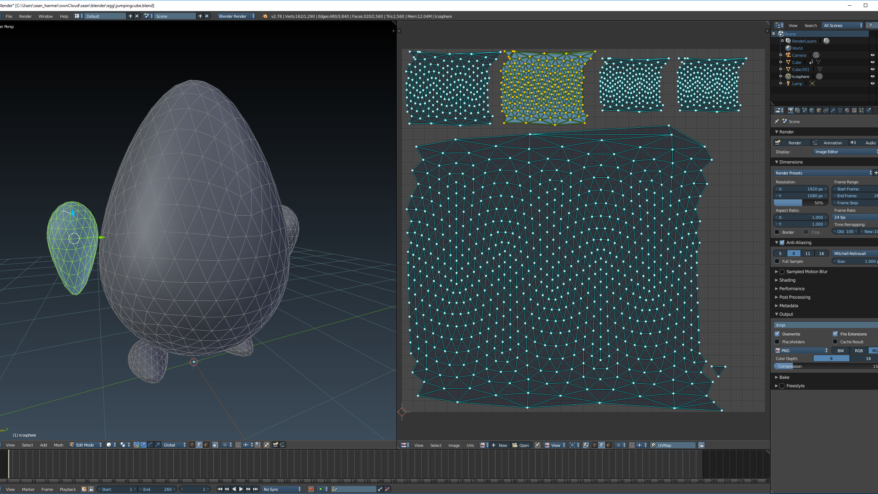
In order to be able to apply images as textures onto our little eggy friend, we need some texture coordinates or uv coords as they are commonly known. All these are is a set of normalised 2D coordinates, one for each vertex in our mesh, that says where to look within an image when applying it to the geometry.
Don’t worry too much about the procedure for generating these coordinates. It varies from mesh to mesh and between 3D editing tools. Typically you mark some seams and use some built in functionality in the editor to do most of the work for you. Think of the seams as being where you would cut a flat sheet of paper if you wanted to wrap it around your mesh without ripping or distorting it. Doing this we end up with something like this:
Please bear in mind that I am not an artist, my day job is pretending to be a developer, yet even with a little bit of practice you can get some nice results in Blender or similar tools.
The final thing we need to do is to export our geometry from Blender for use in the next phases. Qt 3D itself has a plugin based system for loading geometry in various formats. Here we will use the simple Wavefront OBJ file format within Qt 3D. However, to feed our mesh into the texturing tool we will use, we also need to export it into the FBX file format. In Blender, just go to File->Export->[FBX (.fbx) or Wavefront (.obj) to do the export steps.
Texturing
To make our character look nice (from a material point of view, remember I’m not an artist), we will make use of the new PBR based materials in Qt 3D. These materials require textures to be made such that they represent slightly different quantities than older ad-hoc lighting models such as Phong. The king of the hill for PBR texturing work is the suite of Substance tools (written with Qt) from Allegorithmic.
We will use Substance Painter to give our egg a nice surface appearance. To get started, simply create a new project in substance painter and import the FBX mesh we exported from Blender. Then we can use the bakers in Substance Painter to create some additional texture maps for us such as the ambient occlusion map which shadows the areas under the egg’s arms and feet.
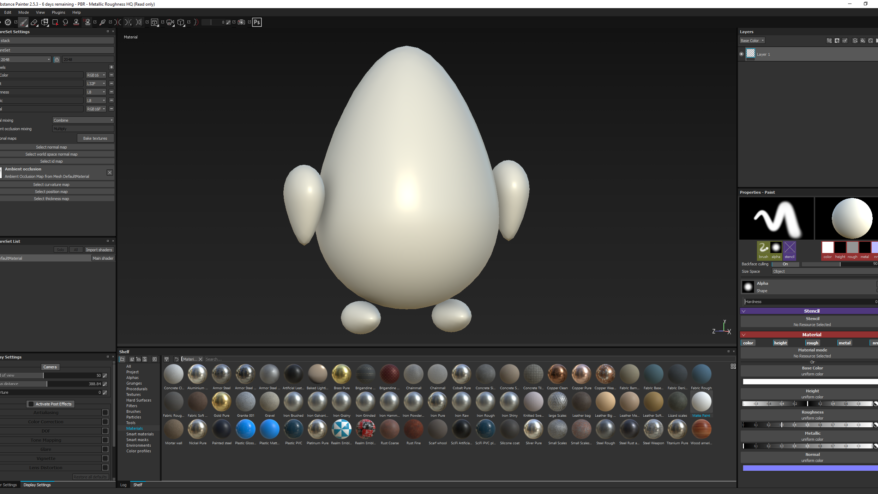
A whole bunch of other helper textures can be baked in Substance Painter but we don’t need those here for this simple project. In more complex projects you can use for e.g. the curvature map to add nice effects like damage or paint flaking off the sharp edges of your objects in an automated way.
We can now start adding layers, either fill layers or paint layers, just like in Photoshop or Gimp. Using the texture coordinates in our geometry, Substance Painter performs the inverse mapping to that which Qt 3D will use at run-time to create the 2D images we will need. Essentially Substance Painter is like Photoshop for 3D objects. We start by adding a simple fill layer using a matte paint substance, choosing a blue colour for it, and adjusting the scaling and paint fleck intensity.
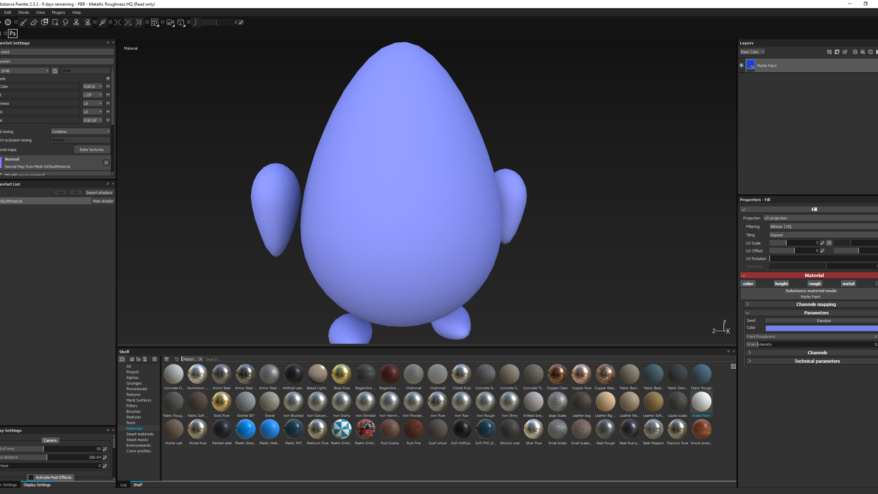
Then by adding a few more fill layers we can make our little guy look a bit more “Eastery” and adding a paint layer or two give him a happy(/quizzical/pained) face and a nice KDAB branded stamp. Note that it is trivial to create your own alpha masks for brushes or even to create your own custom materials using the sister application Substance Designer.
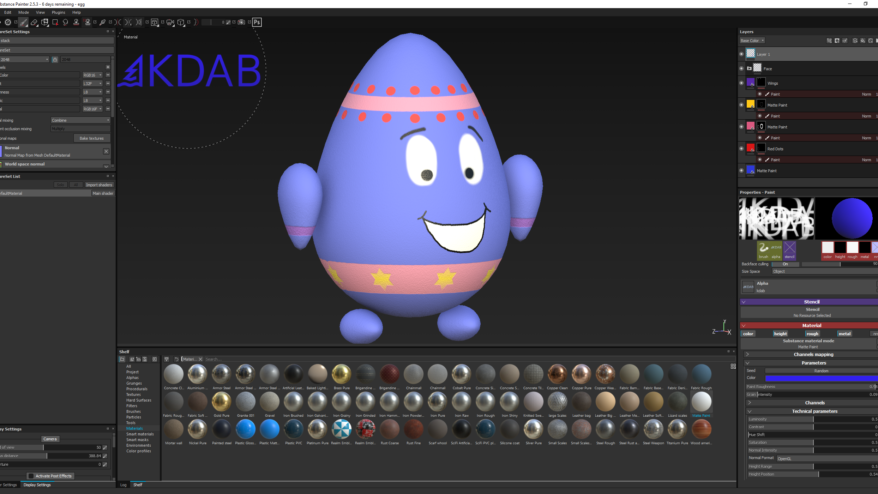
Once happy with your creation, go to File->Export Textures and save the resulting images to disk. Notice that this work flow is non-destructive. You can come back into Substance Painter, tweak it further and then re-export a new set of textures.
Create the Animation
Back in Blender, we can switch from modeling/uv-unwrapping to animation (it can do way more than what I’m showing here). Along the bottom of the window is the timeline and we can split the main view into two parts and switch the top view into a graph editor. This is very handy when animating to make adjustments to your animation curves.
Just as I am not a 3D modeler or texture artist, I am also not an animator. So if you are any of these things please excuse my poor attempts. Even with my lack of skills, animating in Blender is very easy. Simply follow these steps:
- Choose a frame in the timeline
- Adjust the position/scale/rotation of your character/objects
- Hit the “I” shortcut to and from the popup choose which quantity you wish to key frame (Location/Rotation/Scale here)
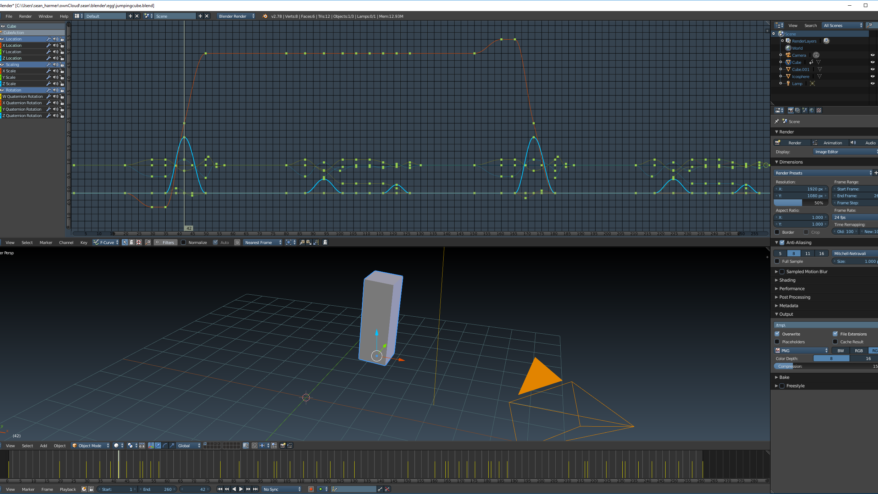
As you add key frames to animate your character, play the animation back often within blender to see how it looks. And if it needs adjusting, this can be done in the graph editor by grabbing the key frames or their control handles.
Once happy with your animation we can export the key frame data it contains into a format that can be consumed by Qt 3D using the Blender addon provided in the Qt 3D git repository. Once enabled, it’s as simple as File->Export->Qt 3D Animation.
Creating the Qt 3D Application
At last we come to the easy part of writing a simple application that uses Qt 3D to render all of the content we have created: the geometry, the textures and the key frame animation data. This is just a perfectly standard Qt 3D application containing a single Entity:
    Entity {
        id: cube

        components: [
            Transform {
                id: cubeTransform
            },
            Mesh {
                source: "qrc:/assets/egg/egg.obj"
            },
            TexturedMetalRoughMaterial {
                baseColor: TextureLoader {
                    format: Texture.SRGB8_Alpha8
                    source: "qrc:/assets/egg/basecolor.png"
                }
                metalness: TextureLoader { source: "qrc:/assets/egg/metalness.png" }
                roughness: TextureLoader { source: "qrc:/assets/egg/roughness.png" }
                normal: TextureLoader { source: "qrc:/assets/egg/normal.png" }
                ambientOcclusion: TextureLoader { source: "qrc:/assets/egg/ambientocclusion.png" }
            },
            ObjectPicker {
                onClicked: animator.running = true
            },
            ClipAnimator {
                id: animator
                loops: 3
                clip: AnimationClipLoader { source: "qrc:/jumpinganimation.json" }
                channelMapper: ChannelMapper {
                    mappings: [
                        ChannelMapping { channelName: "Location"; target: cubeTransform; property: "translation" },
                        ChannelMapping { channelName: "Rotation"; target: cubeTransform; property: "rotation" },
                        ChannelMapping { channelName: "Scale"; target: cubeTransform; property: "scale3D" }
                    ]
                }
            }
        ]
    }
Here you can see that: the Mesh component consumes the geometry; the TexturedMetalRoughMaterial component consumes the texture images; and the ClipAnimator component consumes the key frame animation data. Using the Entity Component System of Qt 3D all of these are optional and you don’t pay the price for them when not using any of these features.
The ClipAnimator is one of the new types available with Qt 3D in Qt 5.9 and it allows the playback of animation clips. The animation clips can either be exported from a digital content creation tool as we did here, or created in your application using Qt 3D APIs. In addition to the animation clip, it also uses a ChannelMapper which allows us to map the channels within the animation clip onto properties of objects in our application. Separating the animation data from what is being targeted by the animator allows us to reuse the same animation many times without having to store multiple copies of it. It also allows us to retarget the animations on to other objects that your animators may not even have known about when creating the animation data.
Qt 3D also provides support for animation blend trees in Qt 5.9 and there’s a whole lot more planned for Qt 5.10 later this year. That’s it for now but we’ll be back after the holiday with more details of the animation framework in Qt 3D.
Happy Easter!

Hello, I know this is an old post but I haven’t found answers anywhere else. Is it possible to have a C++ only version of this sample program ? I know there is a QML version on github and I tried to replicate it in C++ without much success. Thank you